Data services use both XML types and return types.
XML types represent the shape of a logical data service, in the form of an XML schema. They are templates from which return types are created, comparable to a Java class. You use an XML type when you first create a logical entity service and add an XML schema to define its shape.
Adding an XML Type to a Service
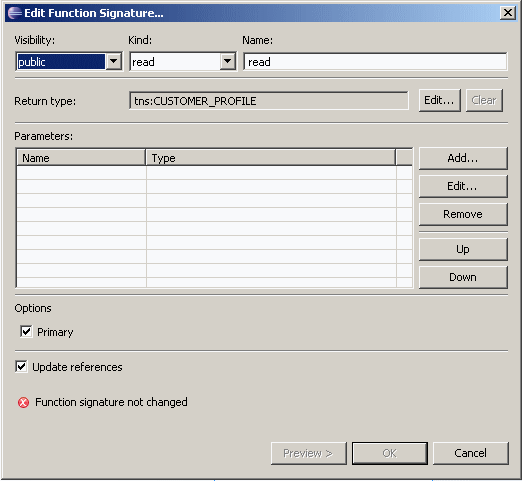
Return types represent the shape of data that a query produces when it is run. They are specific instances of an XML type, comparable to a Java object. Return types are the R in an XQuery FLWOR clause. For example, a service's primary read function returns a return type.
Checking the Return Type of a Read Function
An XML type is the backbone of a logical data service, because it defines the data the service returns. The XML schema that represents the XML type can combine any elements from any data sources the logical data service uses, including relational sources, web services, XML files, text files, and Java methods.
The schema for the logical data service is designed as a separate layer of the dataspace project, regardless of the actual structure of the underlying physical data sources. The schema is not required to use all elements in, or the same structure as, the physical data sources.
You can create a return type schema, an XSD file, in two ways:
Top down, in an XML editor, either the one built into Studio or a standalone editor.
Bottom up, by building the service visually in Query Map view and then using the Save and Associate XML Type command.
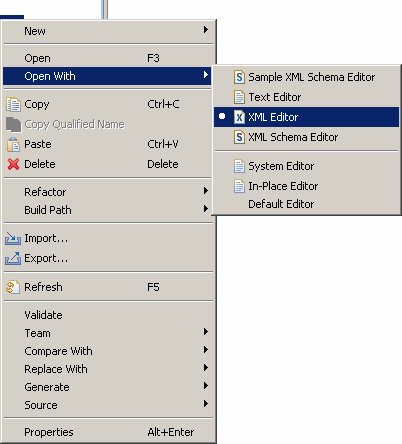
You should create the XSD file in the logical layer of your dataspace project, as it belongs to the logical data service. Studio provides several XML editors, which you can see if you right-click an XSD file in the Project Explorer and choose Open With.
Choosing an XML Editor in Studio
Write a Return Type Schema
To create the schema in an XML editor in Studio:
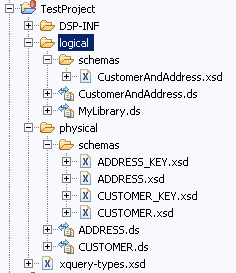
Choose a location for logical data service schemas in your dataspace project.
You may want to create a folder for schemas in the logical layer of your project (for example, MyDataSpace/logical/schemas) separate from the schemas folder that ALDSP auto-generates for physical data services.
Choose File > New > Other.
Choose XML > XML Schema, and click Next.
Choose a folder, enter a file name that ends in .xsd, and click Finish.
The generated schema looks something like this:
In the XML editor, change the URL of targetNamespace to one within your dataspace project:
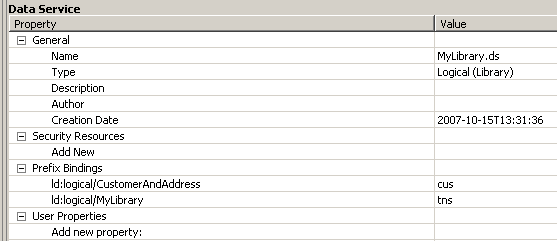
targetNamespace="ld:logical/CustomerAndAddress"
The targetNamespace URL should start with the prefix ld:, and logical indicates that the schema resides in the folder named logical in your dataspace project. The identifier that follows (here, CustomerAndAddress) defines the namespace.
Delete the namespace definition for xmlns:tns, if your service binds tns to a different namespace. You can check this by clicking the Overview tab, then the Properties tab.
Continue adding complex types, elements, and attributes using the XML editor.
Save the file, then right-click anywhere in it and choose Validate.
You can also create the return type schema using an XML editor outside Studio and then move the XSD file to your Studio dataspace project.
Generate a Schema File
You can also have ALDSP generate the return type schema after you build the query map visually.
To generate the schema in Studio, follow these instructions (or see Create Your First Data Services for detailed instructions):
Create a dataspace.
Create physical data services in the dataspace.
Also in the dataspace, create a logical data service (File > New > Logical Data Service).
Create a Read function in the logical data service (Overview tab, right-click, Add Operation).
Drag the Read functions of the physical services you want to use to the Query Map tab.
Click Overwrite , and drag the root element in the For box to the root element in the Return type.
Right-click on the complex element in the Return type, and choose Expand Complex Mapping.
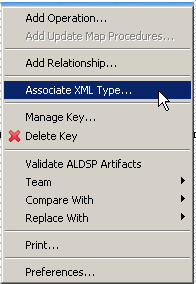
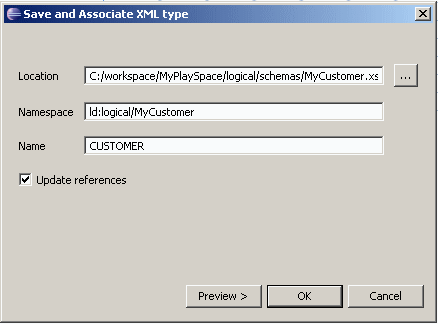
Right-click the return type box, and choose Save and Associate XML Type.
For Location, select the correct folder for logical schemas. In Namespace, enter a namespace that starts with ld:logical, such as ld:logical/MyCustomer. Be sure that the name of the root element (here, CUSTOMER) is unique within the namespace. (The ld namespace refers to the original name of ALDSP, Liquid Data).
Click OK.
Save the file, then right-click anywhere in it and choose Validate.